Saturday, December 10, 2011

This is Why I'm Cold

Even though it's cold outside, I still like to eat summery foods in the winter sometimes.  For some reason I've craved both cold pasta salad and cold tempeh salad during the coldest days so far this season!

Perhaps it's because my tempeh salad is the best thing ever? (and I'm so modest, too)


I just take a package of tempeh (I prefer the Lightlife garden veggie variety for the colorful flecks of veggies and the celery seeds incorporated), roughly chop it, and steam it for a few minutes.  Maybe five?  Then set aside to cool and chop it more finely once it's cool enough to handle.

Finely mince a few tablespoons of sweet onion and a couple stalks of celery.  Drop those into a bowl with about 1/4 cup of Veganaise or Earth Balance mayo.  Add a hefty pinch of fresh or dried dill and a little splash of white wine vinegar.  Then toast up some sliced almonds.  Combine the mayo/veggie mixture, almonds and cooled tempeh in a bowl.  If you happen to have any pickled onions in the canning pantry, this is the time to bust them out.  Just a couple of minced, pickled pearl onions will really make this special.  I almost always round out the flavors with a splash of tamari- it helps this salad mimic the flavors of a chicken salad, but waaaay better.

I like to serve this with some organic Triscuit-style or Wheat Thin-style crackers from the co-op.  And if you have any leftovers, it gets even better the second day!

Friday, December 9, 2011

This is Why I'm Hot

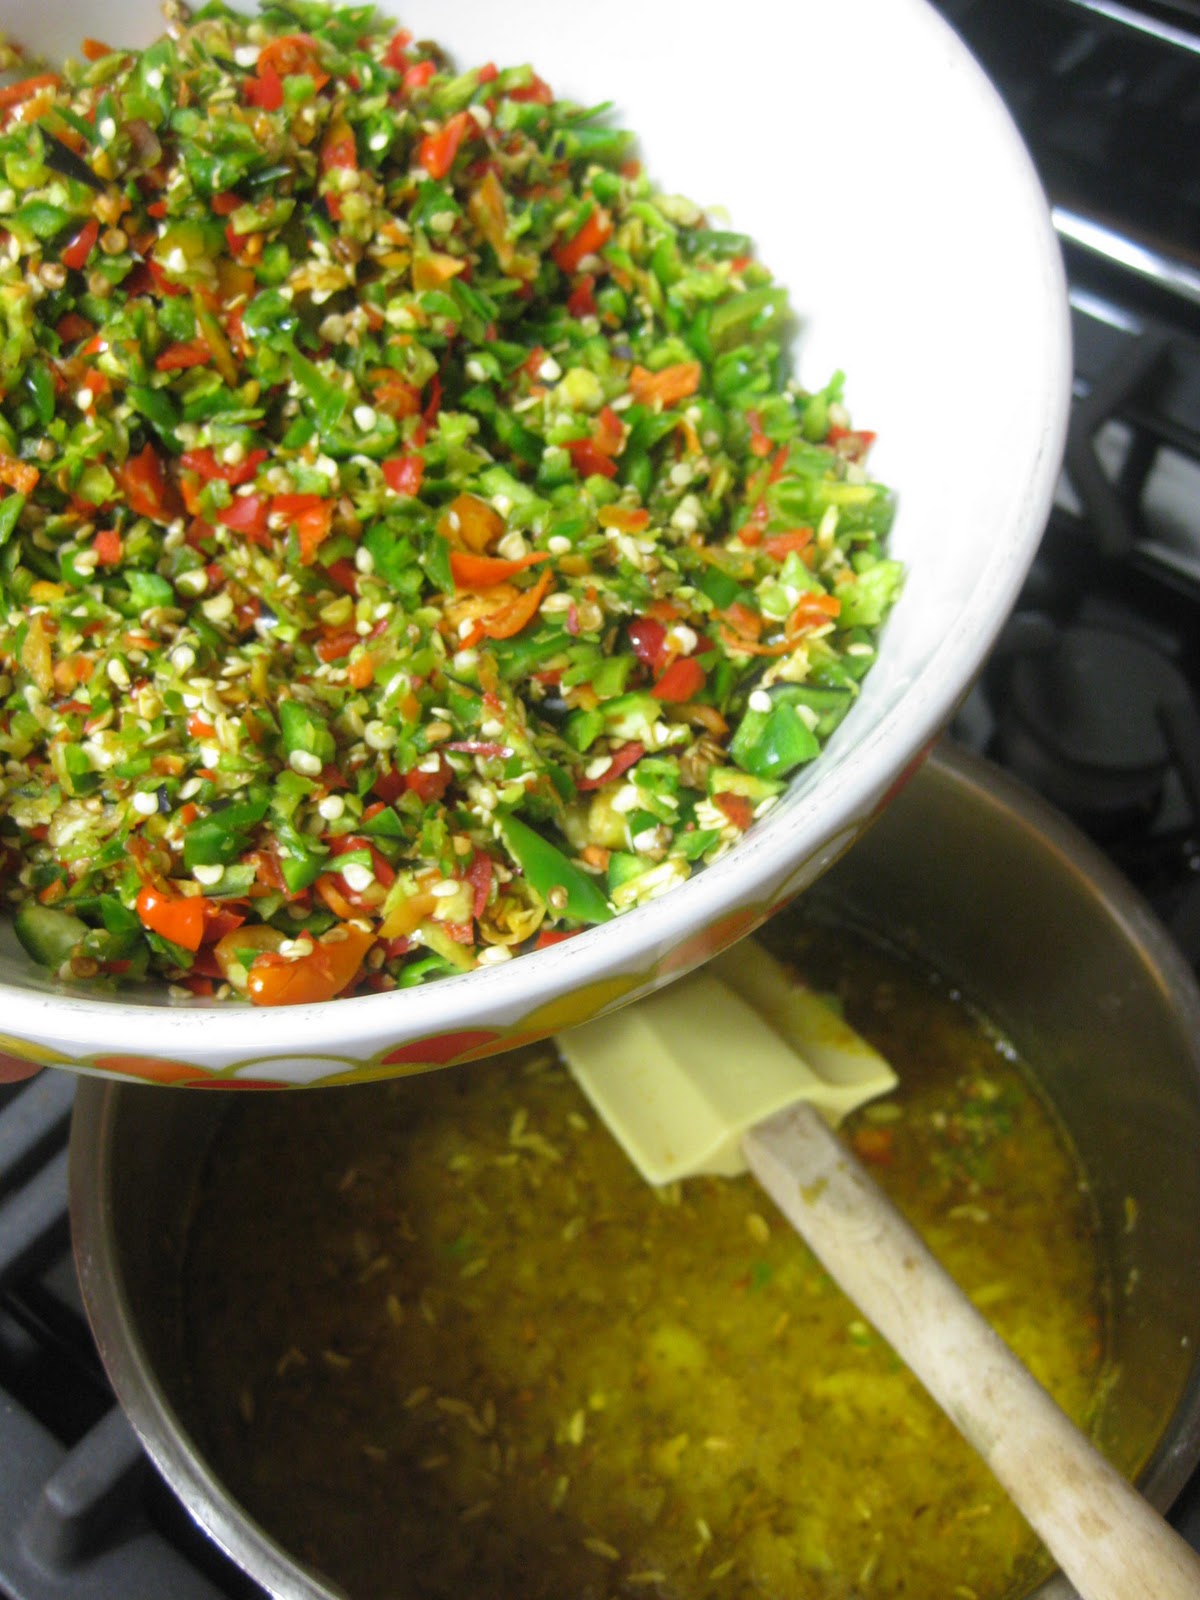
Now that some snow has fallen and the garden is done for the year (except for a bit of kale I'm still pulling out), it's nice to look back at things that make me warm.  Like chiles. 


I went for variety over bulk quantity in the 2011 garden- I had purple jalapenos, regular jalapenos, cayenne chiles, tabasco chiles, Wisconsin lakes sweet peppers, mini chocolate bells, and a few more that I forgot to write down.  On the day I pulled the last of them out, I tucked them in the fridge to use up in various dishes... But a couple of weeks later I was still left with about a pound of various types and colors of chiles.  

The perfect recipe for this situation?  Tigress in a Pickle's "Hot Damn Chile Pickle".  You can use any chiles and don't have to de-seed them or anything.  Just remove the stems and roughly chop (or food process) them. You should, however, wear gloves!  

I tasted this the night I made it (easily two months ago) and it was so fire-y I couldn't even tolerate a drop of the oil on my tongue.  Now, after some time to mellow, the flavors are spectacular and not nearly as abrasive.  Keep in mind, though, that "mellow" is a relative term here.  It's still crazy, crazy hot.  But edible now.

Last night I busted this stuff out with some brown rice, mustard greens and tempeh.  I didn't season anything at all, except for a dash of Bragg's aminos and a DAB of this chile relish.  And it was spectacular.  I have a feeling this is going to be a popular condiment for me this winter!

***Note: you might be alarmed to see garlic and chiles preserved in oil.  Normally this is a no-no for canning and preserving since garden produce, and garlic in particular, can easily have clostridium botulinum spores on them and sealing them underneath oil can form an air-free (anaerobic) environment where the botulism toxin could grow.  That's why it is SO important that this recipe contains vinegar.  I know the recipe isn't canned and you might not even think to worry about botulism and vinegar ratios since it isn't canned.  But the clostridium botulinum bacteria can grow anywhere that is a pH over 4.6 and has low or no oxygen.  So don't can this recipe and don't skimp on the vinegar.  And keep it refrigerated!

Wednesday, November 23, 2011

Thanksgiving Preparations

Honestly, I haven't done much in the way of Thanksgiving preparation yet.  But I have plans to!    

The two things I have done so far are plan my menu for Friday (that's when we celebrate) and make cranberry syrup for fun sparkling drinks.  The syrup is really easy- I just combine a couple of cups of Wisconsin cranberries with one cup of sugar and 1/2 cup of water.  I simmer it until the cranberries burst and then strain it.  


I admit to adding another batch of sugar and water to stretch the cranberries further.  The second batch was still plenty flavorful!  All that's needed for a fun drink is some fizzy water and a couple spoonfuls of this syrup.  

Just look at that color!
Now for the food...

Here's what I have planned:
Homemade Tofurky (Bryanna Clark Grogan's recipe)
Cornbread stuffing (Meemaw's recipe)
Spinach casserole
Roasted portabello mushrooms
Mashed potatoes
Lots of gravy
Cranberry ginger preserves
Rolls
Chocolate Pumpkin Pie (Martha's recipe, veganized)

I plan on cooking all day tomorrow!  I can't wait!

Tuesday, November 22, 2011

Leftover candy canes


In anticipation of an organic candy cane shortage last year, I stocked up on a few boxes too many. Now the candy canes are about to be on the shelves again at my co-op and I figure I'd better get rid of the old ones. Hence, the chocolate candy cane cookies (gluten free chocolate chip cookie recipe with cocoa and crushed candy canes added). Perfect with nog!

Wednesday, November 16, 2011

Chocolate, chocolate

I love pretty much anything that is named chocolate, chocolate _________. These chocolate, chocolate almond cookies are a variation on Dreena Burton's gluten free homestyle chocolate chip cookies.

I just subbed cocoa powder for 1 Tbsp. of the flour (I use millet flour), added a handful of slivered almonds, and a dab of almond extract.

A lovely, lovely, chocolate, chocolate coookie.

Thursday, November 10, 2011

I Love Only One Cake

It's been nearly three weeks since I made (and ate) this cake, but I'm still thinking about it.  It might be the best cake I've ever made- But I have a tendency to love the cake that I'm with (like that Elvis song, "I love only one girl, the one I've got my arms around").  

So here it is, the cake that has captured my heart.  For now.

Step 1: Bake 3 cakes.  
I used the basic chocolate cupcake recipe from Vegan Cupcakes Take Over the World.  Maybe I mismeasured the cocoa in the past or maybe I just don't remember the cupcakes being so darn chocolatey, but this cake is black as night.  I used the same cocoa as always, Equal Exchange fair trade cocoa, and didn't even change anything in the recipe.  

I recommend adding a layer of waxed paper around the bottom cake layer to protect your cake plate from messy caramel and such.  Just remove before serving (duh).

Step 2: Make Peanut Butter Caramel.
This wasn't my idea, it was the kids' idea.  I didn't follow a recipe for this, but it turned out fantastic!  Here's an approximation of what I did:

In a small saucepan, combine 1/2 cup brown sugar, about 2 Tbsp. agave nectar, 2 Tbsp. Earth Balance margarine and a splash of water (no more than 1/4 cup).  There should be just enough water that you can stir everything together.  Heat over low-medium heat until the sugar melts and it's boiling vigorously. As it boils, stir nearly continuously and check the texture of the caramel.  You could use a candy thermometer to check for the "soft ball" stage, but mine broke, so I relied on looking for "sheeting", the phenomemon when a sugar syrup doesn't drip in individual drops off of a spoon held up high- the drops combine into a flat sheet as they drip.  It's just like making jam!  

When sheeting happens, it means your sugar syrup/caramel will be thick and gelled when it cools.  That's what you want here.  If you take it too far (to the hard ball stage), then your caramel will be hard and crackly.  Fun on ice cream, but not in the middle of a cake.  

Once your caramel is at the sheeting stage, turn off the heat and stir in a good 1/2 cup of natural peanut butter.  It'll look something like this.

I want to eat this right now.

Step 3: Assemble the cake.
Your caramel will thicken as it cools, so get your cooled cake layers ready for assembling.  And chop some salted peanuts, too.


Pour 1/2 of the pb caramel over one layer.  Spread it all over, up to the edges of the cake.  Then sprinkled chopped salted peanuts over the whole thing.


Then top with another layer of cake and add more caramel and peanuts.  Finish with the last layer on top.


Step 4: Encase it in chocolate.
Ridiculous, right?  I can barely stop from getting up right now and baking more of this cake.  Let the layers cool completely so that the cake is glued together with caramel and won't budge when you pour tons of ganache over the top.  


I just melted a few Tbsp. of  Earth Balance margarine and almond milk in a pan, then stirred in a whole bag of chocolate chips.  Any firm-setting ganache recipe will do.  Actually, you could skip the frosting and this would still be awesome.  But I opted to drown the cake in chocolate.  Then I topped it with Pokeman guys and piped their images on the top of the cake (removing the paper afterwards).  The kids were happy with it, but I'm willing to be it would taste just as good without Pokeman characters on top.

Step 5: Eat it.

Crazy, crazy good.

Tuesday, November 8, 2011

New favorite thing

I might be in love with my new stove. (This is not to the exclusion of my previously declared love of my mattress heater).
My old stove didn't light on its own anymore and I got tired of feeling a back draft of flames every time I wanted to heat some water for tea.
We have appliance insurance from our electrical utility, so they replaced it when they couldn't repair it. I went to Warners' Stellian (of course) and picked out this one. It's hard to choose a stove- it's a pretty important appliance in my life. But this Bosch was on a super sale and sports an 18,000 BTU power burner (higher than all the others in my price range). I can't wait to see how quickly my canner comes to a boil on this baby!
Plus, it's beautiful.
The first thing I cooked on it was a feast of basmati rice, coconut & cumin kale, and lentil & split pea dal.